
As an accounts payable clerk, when I generate a vendor payment, I would like to export the payment file with a specific name to be easier to identify the payment.

I will show you how to transform the ISO20022 credit transfer filename dynamic. Filename output “As is” and “To be” analysis:
As is (filename provided by Microsoft)
“ISO20022 Credit transfer”
- Fixed filename.
To be (you want to have a dynamic output)
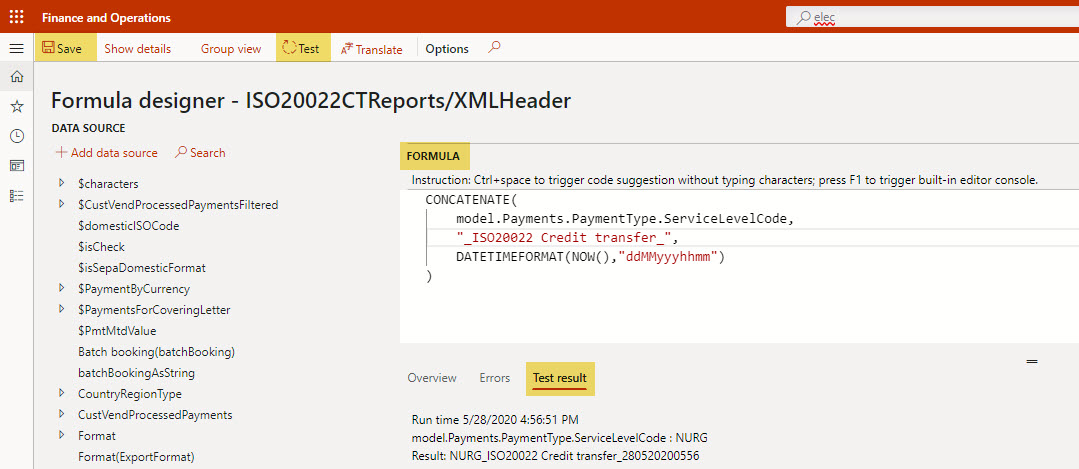
NURG_ISO20022 Credit transfer_280520201601
- “NURG” – service level configured in the method of payment and copied to the journal. Dynamic output.
- “ISO202002 Credit transfer” – free text and set in the ER parameters. Fixed output.
- “280520200555” – date and time set in the ER parameters. Dynamic output.
After imported from LCS repository all the GER configurations, you should do the following steps to achieve the to be filename purposed.
- Go to Electronic reporting workspace > Reporting configurations > Payment model > ISO20022 Credit transfer > ISO20022 Credit transfer (CE), here CE correspond to country extension;
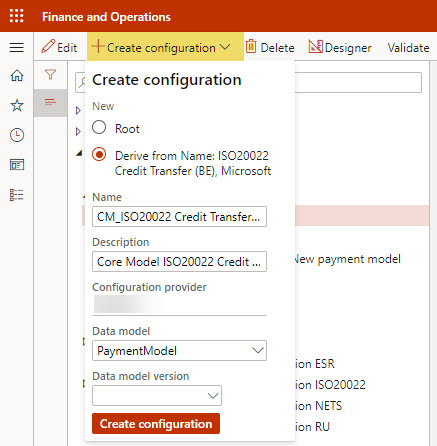
- Click on Create configuration;
- Select Derive from Name: ISO20022 Credit Transfer (CE), Microsoft;
- Enter a Name and Description. E.g. Name: CM_ISO20022 Credit Transfer CE and description: Core Model ISO20022 Credit Transfer CE.
- Configuration provider will be automatically filled in with the configuration provider that you have created.
- In case you didn’t have created:
- Go to Organization administration > Electronic reporting > Configuration provider table;
- Click on New.
- Enter your company name in the name column;
- Enter your company internet address in the internet address column.
- Go to Electronic reporting workspace > Configuration providers;
- Click on the provider created and set as active.
- Go to Organization administration > Electronic reporting > Configuration provider table;
- In case you didn’t have created:
- Click on Create configuration.
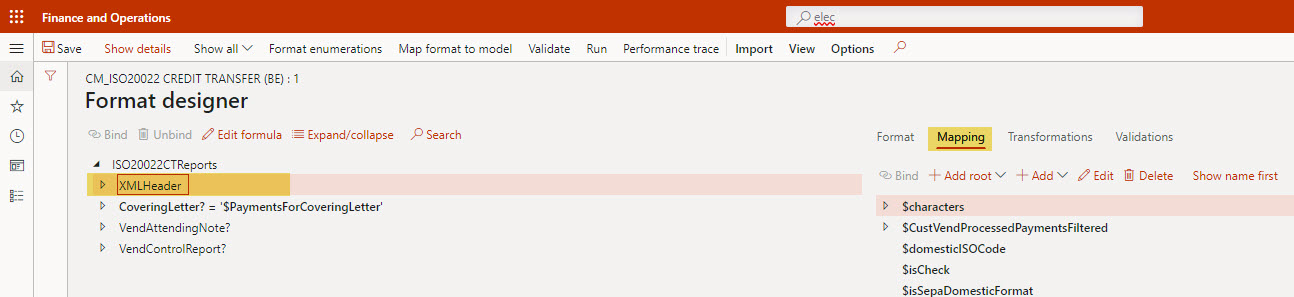
- After the configuration created, you should click on Designer.

- Select the XML Header and click on Mapping.
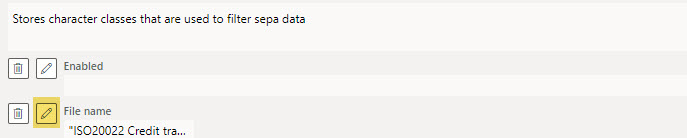
- On the bottom of the page, in the right side, click on Filename edit.
- And now, on the Formula side, you can enter the formula that you want.
- You have different ways how to use the formula designer. More details here: Formula designer in Electronic reporting (ER)
- On my example, I am using the advanced formula editor.
- On the left, you have the Data Soure.
- On the right, you have all the Formulas available.
- Once you have entered the formula, you can test and save it.
- More details about formula language and functions: Electronic reporting formula language
- You should change the status to Complete.
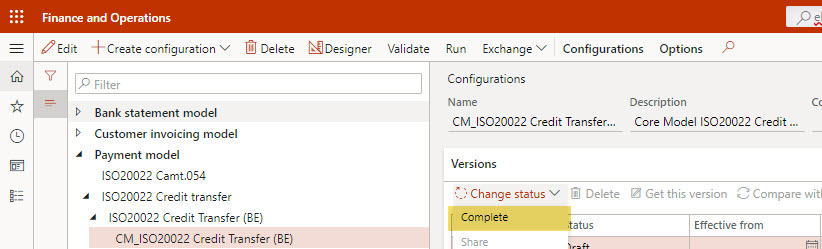
- Finally, you are ready to start to generate payments with the file name that you want.
- In the method of payment, in the field “Export format configuration” you should have selected the format configuration created (CM_ISO20022 Credit Transfer (BE)).
